开源离心机
标签:arduino DIY 3D
XMakerSchoolStanley 发布于 2017-06-10 14:50
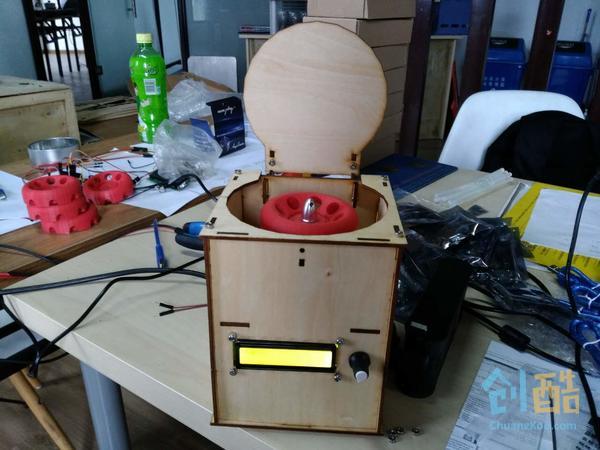
离心就是利用离心机转子高速旋转产生的强大的离心力,不同密度的物质受到的离心力不同,在离心力的作用下分离不同的物质。离心机经常在DNA提取中用于分离固态杂质,蛋白质,核酸,在疾病检测中用于分离血浆和血清。
本项目基于biohackacademy的离心机项目,在此基础上简化。
所有图纸,程序都可以在这里下载https://github.com/fablab-chengdu/BHA_Centrifuge
调试视频https://v.youku.com/v_show/id_XMjgxNjAxOTY1Ng==.html?spm=a2hzp.8244740.userfeed.5!2~5~5~5!3~5~A
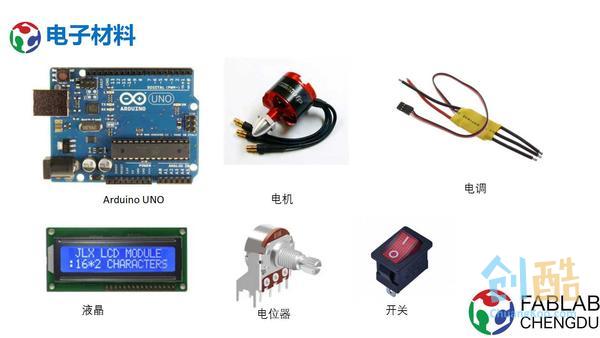
Step 1: 材料清单
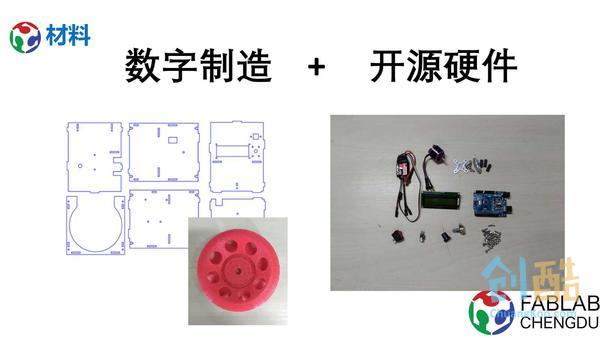
1 旋转平台,3d建模打印实现
2 机壳,激光切割实现
3 Arduino Uno *1
4 无刷电机*1
5 好盈电调*1
6 1602I2C液晶
7 电位器
8 开关
9 杜邦线若干
10 M3螺丝,自锁螺母40对左右
2 机壳,激光切割实现
3 Arduino Uno *1
4 无刷电机*1
5 好盈电调*1
6 1602I2C液晶
7 电位器
8 开关
9 杜邦线若干
10 M3螺丝,自锁螺母40对左右
Step 2: 电路的连接
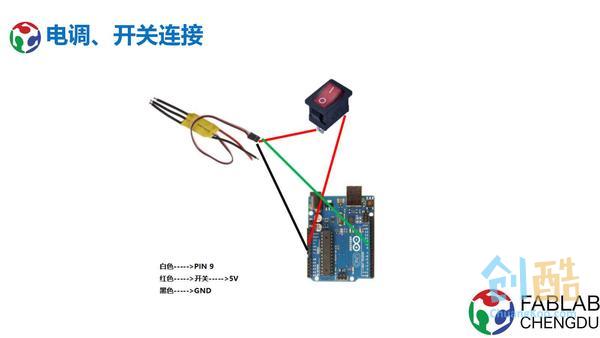

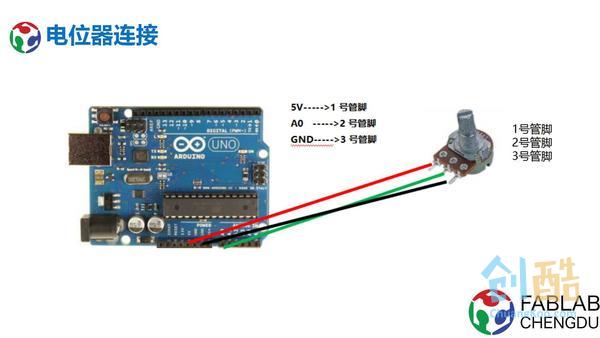
Arduino通过电调供电,电调经过开关连接arduino的5V供电引脚。
Step 3: 电子模块装配
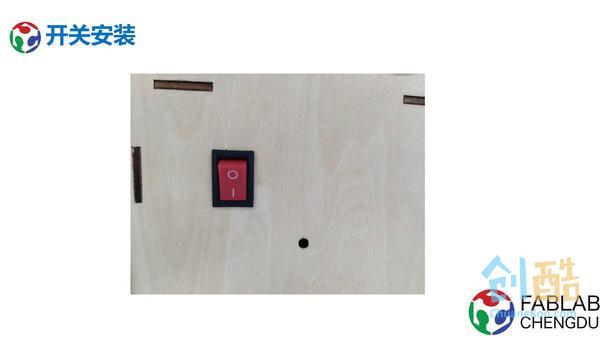

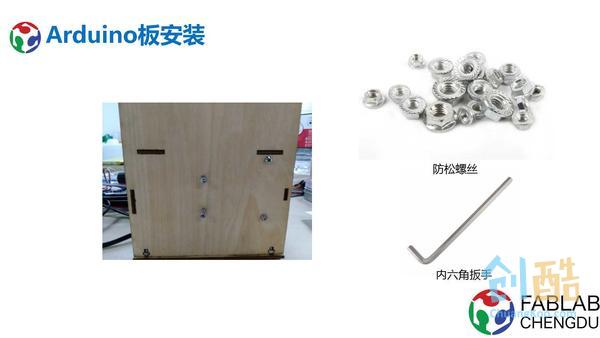
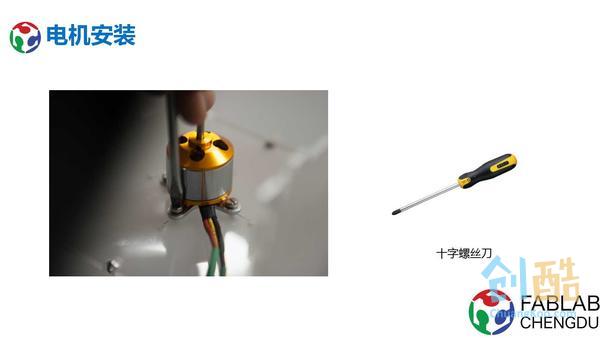
电子模块全部采用自锁螺母安装,机器工作时振动很大,普通螺母容易脱落。
Step 4: 机壳安装
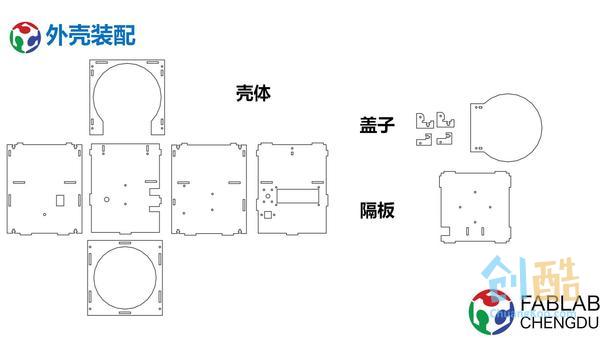
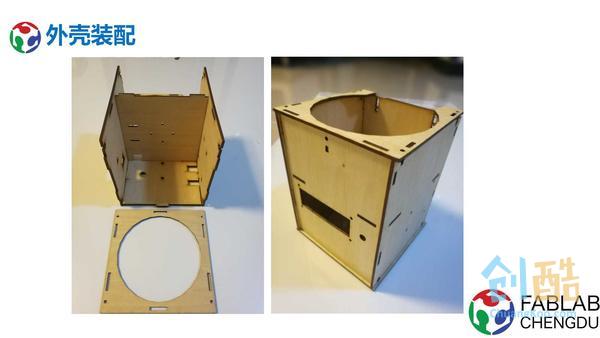
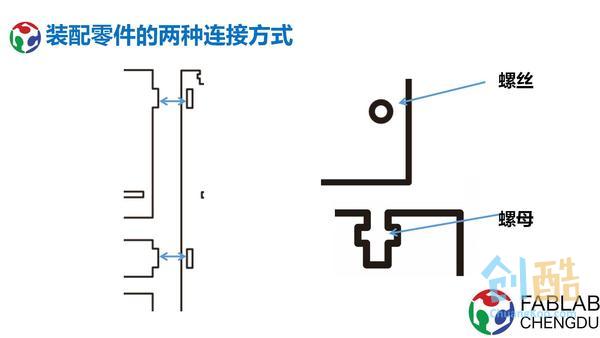
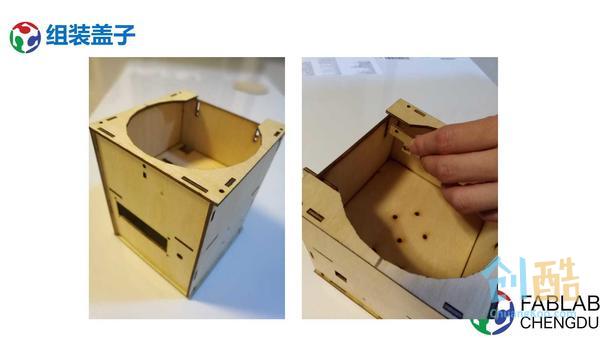
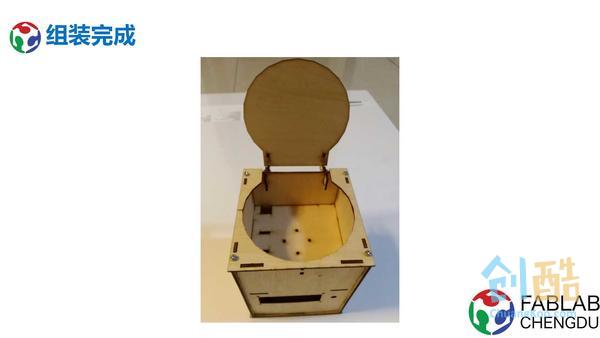
机壳是用激光切割的锻木板,按照平面展开图安装,全部用自锁螺丝,不然开机一会就散架了
Step 5: 程序调试
因为采用的是开环控制电机,程序比较简单,只需要把电位器的值映射成电调的pwm控制信号。
#include "LiquidCrystal_I2C.h" // Needed for operating the LCD screen
#include"Wire.h"
#include <Servo.h> // Needed for controlling the ESC
LiquidCrystal_I2C lcd(0x3F,16,2);
int potpin = 0; // analog pin used to connect the potentiometer
int val; // variable to read the value from the analog pin
Servo firstESC, secondESC; //Create as much as Servo object you want. You can controll 2 or more Servos at the same time
/* *******************************************************
*/
void setup() {
// Open serial connection and print a message
Serial.begin(9600);
Serial.println(F("BioHack Academy Centrifuge"));
// attaches the ESC on pin 9 to the myservo object
firstESC.attach(9); // attached to pin 9 I just do this with 1 Servo
// Initialize the LCD and print a message
lcd.init();
lcd.backlight();
lcd.clear();
lcd.setCursor(0,0);
lcd.print(F("Centrifuge"));
lcd.setCursor(0,1);
lcd.print(F("Fab Lab Chengdu"));
delay(5000);
lcd.clear();
}
void loop() {
val = analogRead(potpin); // reads the value of the potentiometer (value between 0 and 1023)
int s = map(val, 0, 1023, 0,11760 );
val = map(val, 0, 1023, 1000,2000 );
Serial.println(val);
lcd.setCursor(0,0);
lcd.print(F("Centrifuge"));
lcd.setCursor(0,1);
lcd.print(s/10*10);
//First connect your ESC WITHOUT Arming. Then Open Serial and follo Instructions
firstESC.writeMicroseconds(val);
delay(50); // waits for the moto to change speed
lcd.clear();
}
登录以发表评论
请问一下,为什么下载文件里没有激光切割板的图纸啊?
崇拜一下!高大上啊
哈哈哈
